Category Archives: Insects Abound!

Growing squash – problems and solutions
Squash plants love the hot summer sun, and Kansas has plenty of it! Any vegetable gardener in the state who has been growing for very long will likely have planted some variety of squash. There are a few issues that can pop up when growing squash, but overall, it is usually pretty easy to grow.

In the Demo garden, we are growing both summer squash and winter squash. Contrary to what the names imply, both types of squash are grown during the heat of summer; one main difference is that summer squash is grown for its young or immature fruit (think zucchini), while winter squash is grown for its fully mature fruit, so it takes longer to be ready (think butternut squash or pumpkins).
Summer squash grows in a bushy shape and is generally ready to harvest by mid-summer. When harvested at small sizes, they have a soft, thin skin and unsubstantial seeds and can be eaten raw. If left on the plant to grow very large, though, they become tough and too bitter to eat raw. The most popular types of summer squash are zucchini and yellow squash, but other types include pattypan and tromboncino.
We have two varieties of summer squash in the demo garden, and both are varieties of zucchini: ‘49er’ and ‘Astia,’ which both are beginning to yield a harvest.
‘49er’ is a yellow zucchini which has about 50 days to maturity (DTM), and ‘Astia’ is a dark green zucchini with 48 DTM. Both are best harvested at about 5-6 inches long. (Yellow squash and yellow varieties of zucchini are similar, but different; zucchini maintains a relatively consistent diameter, whereas yellow squash is broader at one end and tapers toward the other, and often has a slightly thicker skin than zucchini.)


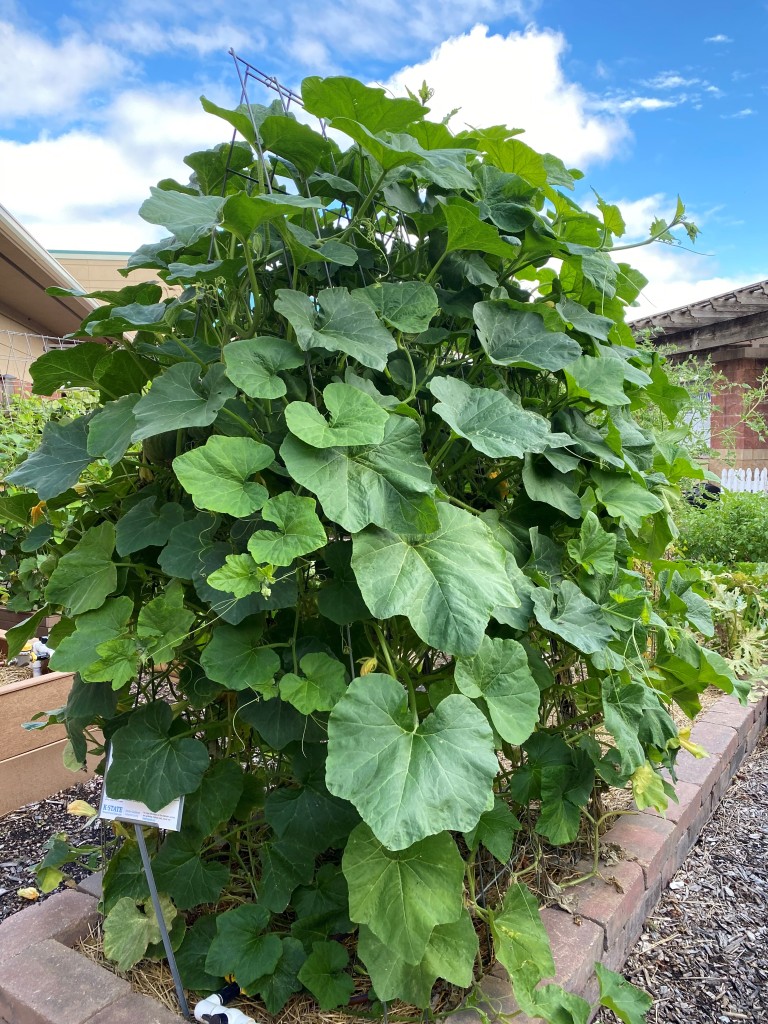
Winter squash generally has a vining nature and needs either lots of space to sprawl out or a trellis to grow vertically when space is at a premium. Because it is harvested when fully mature, it has a tougher skin than summer squash that is not usually eaten. Winter squash is usually ready to harvest late summer or early fall. One of the benefits of growing winter squash is that it can store well, even through the winter months. The winter squash in the demo garden (‘Waltham’ butternut and ‘Autumn Frost’ acorn squash varieties) are setting fruit but won’t be ready to harvest for several more weeks. We’ll keep you posted!

A couple of the biggest challenges with growing squash are the squash vine borer and the squash bug. Both of these insects can wreak significant havoc and are taking their toll now in the Demo garden.
The classic symptom of squash vine borer is a wilted plant when the plant has been watered well and shouldn’t be drooping. Upon closer inspection, you may be able to see that the stem has small holes or is chewed up close to the ground with larvae frass at the base. At this point, it is important to remove the larvae by either disposing of the plant completely, or, if you’re feeling surgical, slitting the vine with a sharp knife until you find the larvae and then removing it. The slit vine can be placed back in the soil and kept moist in the hopes that it will send off new roots, but some plants may have been damaged beyond repair and won’t recover from the “surgery.” If the larvae are not removed and are allowed to complete their life cycles in your garden (in which they eat their way out of the stem, burrow 1-2 inches into the soil, and wait in a cocoon until the next season), the problem will likely return next year. Once you have squash vine borers, there is not a whole lot you can do; to learn about treatment options and cultural controls, see this helpful publication.


Another pest we are facing in the Demo garden is squash bugs. Adults look similar to stink bugs and can be found on many species of the cucurbit family, but squash is their favorite. Adults and nymphs (which are lighter grey with black legs) cause damage by sucking out juices from plant leaves, resulting in yellowing, wilting, and death of the plant when populations are large. Squash bug eggs can be found by scouting on the under sides of leaves – they are glossy brown and laid in groups in between leaf veins. These eggs can be scraped off and disposed of to help control, but here in the Demo garden, the problem has passed the egg stage, and we have begun chemical control to limit the damage. Squash bugs are best controlled at the nymph stage, since adults have a hard shell that protects them from pesticides. We have applied one round of spinosad by spraying it on the vine and branches where the nymphs are congregating. We won’t be able to harvest zucchini for at least three days after spraying, and depending on what the squash bug population looks like after the application, we may spray again in about a week. We use chemicals sparingly in the Demo garden, which are safe when used appropriately. As always… when using chemical pesticides, make sure read and follow the label! To learn more about squash bugs, click here.


One last issue we had with the zucchini earlier this year was small fruit (around 3 inches) that shriveled up or rotted from the blossom end of the fruit before coming to harvestable size. This symptom can be due to a couple of different culprits, but is ultimately related to an issue with pollination.


Sometimes high temperatures following a mild or cool spell can limit the number of pollinators that are active in the garden; sometimes over-fertilization (high nitrogen levels) in the soil can cause the plant to produce too many male flowers; and sometimes plants don’t produce enough male and female flowers at the same time to ensure enough pollination (this issue usually resolves itself as the season progresses.)
We stepped in to lend our zucchini plants a pollinating hand, and you can too if you see this issue in your garden – it is as simple as taking the pollen from the male flowers and transferring it to the female flowers. First, identify which flowers are female and which are male; female flowers often have a swelling behind the flower head where the fruit is barely beginning to form, whereas male flowers have a straight stem behind the flower head. Another, perhaps more reliable way to tell is to look inside the flower: the female has a stigma which is larger and slightly round or bulbous, and the male has a single, straight appendage – the anther – inside the flower.

Hand-pollinating can easily be done by using a small artist-sized paint brush to transfer pollen from the male to the female flowers; lightly touch the tip of the brush to the anther on a male flower and dab the pollen that the brush picked up onto the stigma of a female flower.
With a couple hand-pollinating sessions, a relative evening-out of temperature, and an uptick in pollinators in the garden, our zucchini are now producing harvestable fruit. Now it’s a matter of fending off the squash bugs so that we can keep harvesting this delicious summer garden staple!
Resources for further reading:
By: Maureen Wilbeck, Master Gardener
First Day of Summer Garden Update
It’s the first day of summer, and it feels like it! Like many of you, there are good and bad things happening in the garden due to the excessive rain and milder temperatures. Honestly…we kind of need this heat to push along some of our warm season plants.
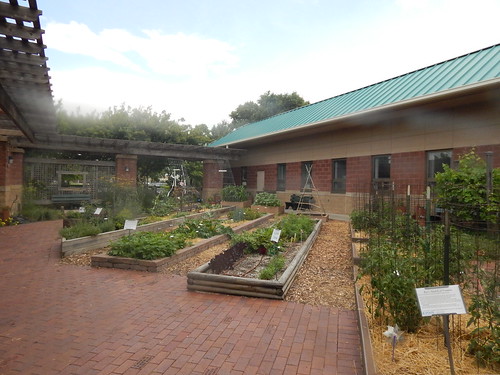 It has been awhile since an update, but that doesn’t mean we have been MIA in that garden. As you can see, despite the weather challenges, the garden is planted, we have been harvesting, and things are going well. One benefit of the raised beds (and the drainage tiles underneath our garden!) is that no matter how much rain we have gotten, it drains away fairly quickly. So we are not seeing too much root damage from saturated soils.

The herbs & pollinators garden has been growing gangbusters, with absolutely huge bronze fennel, lush parsley, and several beautiful agastaches.
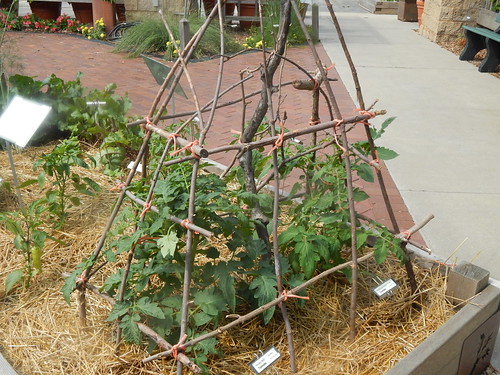 We once again have a SNAP-Ed garden, where we are highlighting the ability to use SNAP dollars to purchase garden plants. We track our expenses and the value of harvested crops. We also have to budget for every purchase, so there is often not money to purchase tomato cages or similar items. The gardeners built this homemade tomato cage for the two tomato plants. We will see if it fares better than last year’s homemade cage!
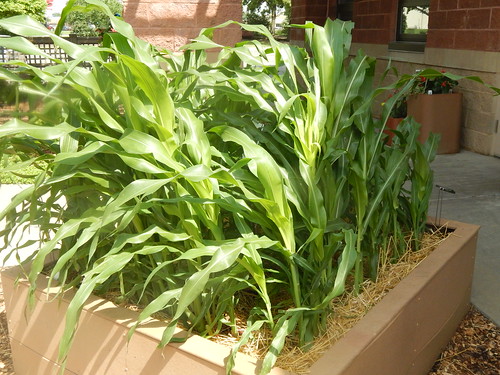 Corn is something new for us in the Demo Garden, simple because of the space requirements. We tried a Peruvian corn variety a couple years ago, but it didn’t grow. This corn is ‘Glass Gem’ popcorn. We are interested to see how it performs in the small area we have given it.
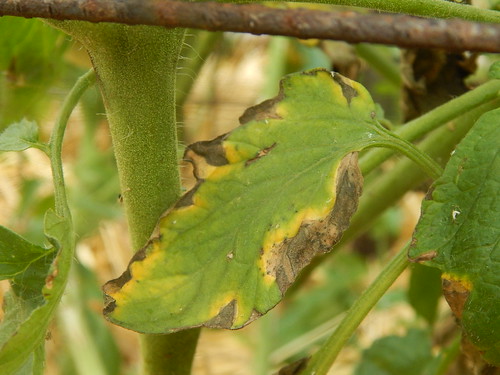 Lest you think all is well in the garden, we are starting to see a fair amount of early blight on the lower tomato leaves. We hadn’t mulched the garden until last week, which probably didn’t help prevent disease. Mostly this is a rain and humidity problem. Cultural controls would include mulching, caging or staking, and keeping the leaves dry. Fungicide options would include chlorothalonil and copper-based products. It is important to note that fungicides only prevent new leaves from becoming infected, NOT cure infected leaves.
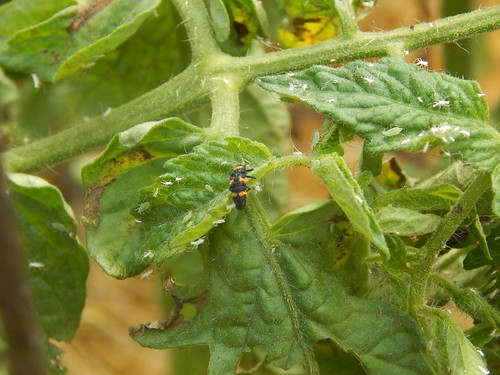 The other thing that we are seeing right now are aphids all over the tomatoes. This is quite abnormal, but probably due to the cooler weather. The benefit of hotter weather is that it should help the tomatoes grow faster and slow down the aphids (which normally like cooler weather). The white specks are the molted husks of the aphids. The black and orange guy is a ladybug larvae that is happily feeding on the aphids. We are hoping that between the hotter weather and the ladybugs, we won’t need to treat for the aphids.
There is much more to see in our garden, so come on over at visit us sometime!
The Milkweed Ecosystem
These are some pictures taken by one of our Master Gardeners, Lisa LaRue, back in mid-August. We always love our butterfly and pollinator bed because it is beautiful and beneficial to the environment of our garden. These pictures take a closer look at everything that is going on in that garden.
 Of course, this is one of the things we are hoping to see when we plant milkweed in our garden. Lots of happy, monarch caterpillars munching their way through life.
 What many people planting milkweed don’t realize is that you can get a whole bunch of other insects as part of the bargain. It is very common – and completely normal – for milkweed to be just coated with bright orange aphids during the summer. They also will often get milkweed bugs (the black and orange bugs pictured). So…what to do? The thing is that you can’t spray anything without causing harm to the caterpillars you are trying to encourage. The good news is that the aphids and milkweed bugs are really not causing any harm to the milkweed, or anything else in the garden. By this point (a month later), the aphids are completely gone and no harm was done.
 The other benefit of leaving those aphids where they are is that they provide a food source for hungry ladybugs. The hoards of aphids are a feast for ladybugs, and by letting the aphids stay on a plant that isn’t being hurt and that really doesn’t matter for anything other than looking nice and feeding caterpillars/butterflies, you are actually “farming” more ladybugs for the rest of your garden. This picture shows two ladybug pupa (the stage between the larvae and the adults) on the milkweed.
This is how ecological gardening is supposed to work, and a great example of how lots of diversity in your garden is beneficial. We certainly aren’t eating the milkweed, and if you were strictly focused on what you could harvest from the garden to eat, it would seem like a waste of space. But by growing something that benefits our beneficial insects, we now have a higher population of ladybugs in the garden for when there are aphids on something we DO want to eat.
 This has nothing to do with the rest of the post, but I wanted to show the swallowtail chrysalis just for fun. We have had a great time this fall finding all the places that both the swallowtail and monarch caterpillars go to make their chrysalis!
A Look at the Parthenocarpic Squash
Outwitting the squash vine borers is one of the ongoing themes in the garden this summer. Let’s take a look at our parthenocarpic (no pollination needed) squash trial.
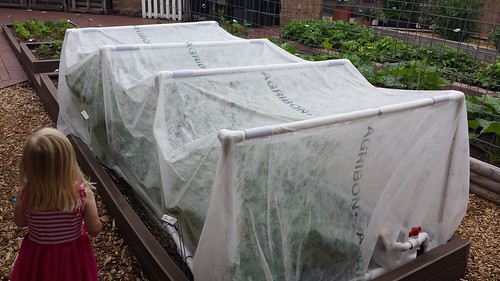 This is the fancy cage we built for the row cover over the squash. We hadn’t really made new row covers/low tunnel frames for the new raised beds yet, so this seemed like a good opportunity to try something new. One of the things that I’ve always struggled with on our raised beds is how to manage the lower edges without resorting to a bunch of bricks or milk jugs of water. I had this idea to use a PVC frame along the bottom edge that the row cover could be clamped to. We also decided to make a larger, square frame because the squash get big, especially under cover.
The biggest problem we’ve had is that there’s no good way to open the row cover when we need to get in and work on the plants or harvest. When we take the clamps off, it tends to tear the fabric. So…it’s a good idea, but still a work in progress.
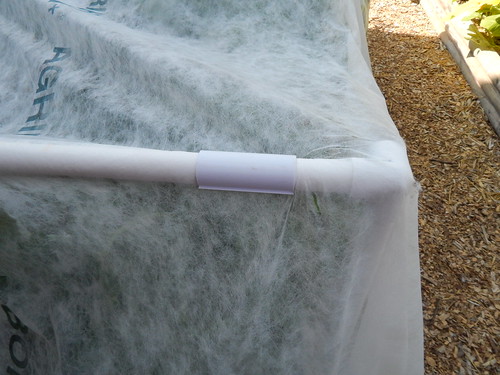 That’s what the clamps look like, in case you were curious.
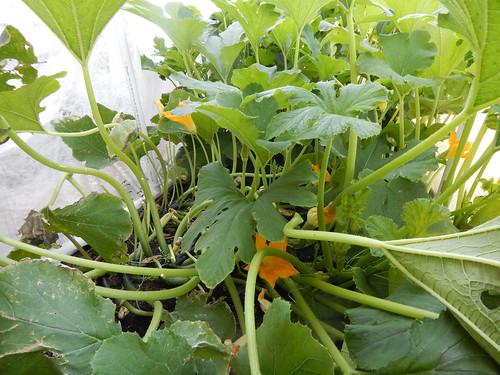 The squash under the row cover are looking quite jungle-esque. This is pretty typical when you have plants under a row cover. They are protected from the wind and they are slightly shaded, so they tend to get a little bit tall and leggy. You can see the longer, skinnier stems on these plants compared to what you might expect. It’s also nice and warm under the row cover, so the plants grow quickly.
As you can see, we are starting to get some flowers. With most squash, when using row cover to circumvent the squash vine borer, we would take the row cover off right now. However, since we are using parthenocarpic varieties that supposedly require no pollination to set fruit, we shouldn’t need to do that. It will allow the protection to continue until we take the row covers off.
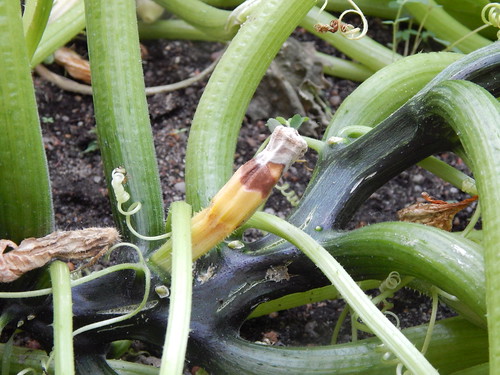 So…is that translating into squash? As you can see from this picture, the answer is not so much. There are several squash that are clearly rotting and have not successfully set. Now, it could just be early and this will straighten out. It could be that the varieties we picked are only partially parthenocarpic. Or it could be that the project is a big bust and we’ll have to take the row cover off to get any zucchini. I looked up the varieties we chose to see if there was any data on how they do. ‘Partenon’ was listed as setting fruit 69% of the time parthenocarpically. I didn’t find any data on ‘Segev’. So, we’ll see how things continue! The plus side is that even if we have to take off the row cover now, the plants should be large enough to withstand quite a bit of squash vine borer damage before they die.
Insects on the Grape Vine
This is a good example of why it is worth it to take a closer look when you see something abnormal going on in your garden. I was out in the garden a few days ago and noticed that there were a few leaves on the grape vine turning brown. I kind of mentally shrugged and figured that maybe a few spider mites or something was happening or maybe just a little leaf drop in the later part of the season. 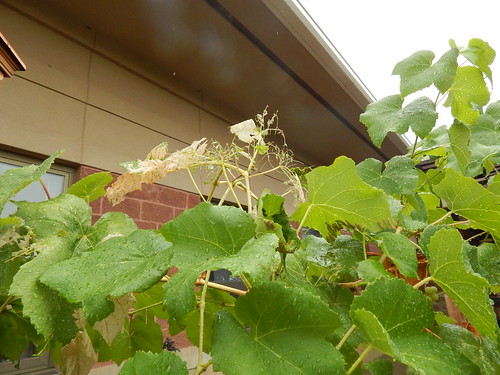
I noticed it again yesterday as I walked by, and then did a double take when I realized there were leaves that looked chewed on. Oops. Then I took a closer look and found two things going on.
 This dude is a sphinx moth caterpillar, happily munching on the end of the shoot. Although he is eating quite a bit, I’m not concerned that he will kill the plant and just decided to leave him alone. If you look on the left side of the picture, you will also see some other insect feeding damage, but that wasn’t done by this guy.
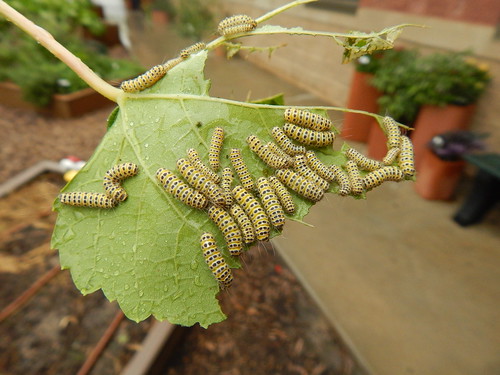 Oh no, all that damage was done by these cute little larvae. I suspect they are either grape sawfly or grapeleaf skeletonizer, based on their appearance, but I haven’t had time to do any more research. One of the Extension articles suggested picking off the leaves with the larvae on them, because grapes don’t mind a little leaf thinning. I picked about 10 leaves off that were heavily infested and we’ll see if that stems most of the problem.
I doubt that they would seriously damage the vine at this time of year, but it is still a good thing we caught them before the whole plant was munched up!


