Monthly Archives: March 2014
Can I Use a Home Soil Test Kit to Test My Soil?
When I t alk about soil testing, one of the most frequent questions I get asked is if they can just use a soil test kit that you buy at a garden center rather than doing a lab test. (You can have a lab test done through K-State or through a private lab.) One of the biggest differences between a soil test kit and a lab test is that the kit just gives you a general idea of your soil characteristics, whereas a lab test gives you an accurate numerical value of your soil pH and nutrient levels.
Someone gave me this soil test kit last year, asking if I could use it. I decided that I would use the opportunity to compare the results to a known lab soil test and see how the kit worked. (I had my backyard soil tested last summer, so I know what the results should be. That’s my comparison.)
As you can see, it is a pretty cheap test at $3.27. It tests the pH, nitrogen, phosphorus, and potassium. You compare the color of your final solution to the chart and using the comparison can amend your soil using recommendations from a tiny chart on the back of the directions.
I made sure to read the instructions a couple times before starting and I had my phone at hand to act as the timer to make sure I shook things long enough and let them rest the right amount of time before reading the results.
First Up: the pH test
pH is a test of the acidity/alkalinity of the soil. The instructions were to take a scoop of soil from about 4″ deep and fill the green-capped tube to the first line.
 Okay, check. Can you see the first problem with this test? No? I’ll explain in a minute. Then you fill the tube with water (preferably distilled) up to the fourth line. Do you have distilled water right at hand? If not, are you going to stop everything and run out to buy 1 tablespoon of distilled water for a more accurate test? You’re right if you guessed that I didn’t, even though I know that our city water tends to run alkaline and that could possibly make the test less accurate.
So, I added the water, added the capsule (Which you don’t just plop in, by the way. You have to open it and very carefully dump the powder into the tiny tube. Not fun.), and shook thoroughly. I let it sit for the designated 1 minute, then compared the results to the chart.
 Well, what do you think? Can you tell what color that is? Yeah, I couldn’t either. It looks too yellow to be neutral, but too green to be acid (6.0). I guess that would put it somewhere in between the two, which would seem to be ideal. Of course, I also know that the tap water could be skewing that.
So how does this result compare (ambiguous result notwithstanding) to the lab test? Well, my lab test showed a pH of 5.2. Yikes! That’s a BIG difference.
Did you figure out the other problem with this test? This test is only really testing the pH of that 1/2 tsp of soil I put in the tube. The pH of that small bit of soil could very well be 6.5. But the randomized lab sample tells me that the average for the entire area is 5.2. On this part of the test, I have to give the kit a big FAIL!
Next Up: N, P, & K
So for these tests, you are supposed to take 1 scoop of soil, 4″ deep, and mix 1 part soil with 5 parts water. Now, there is the potential here to get a more randomized, average sample if I went to the trouble to collect several scoops of soil, mix them together, and then mix that soil with 5 parts water. You are supposed to stir or shake the mixture for at least 1 minute and then let it settle for at least 10 minutes. (I wonder how they account for sandy vs clay soils doing this? Clay soils take much longer to settle out than sandy soils.)
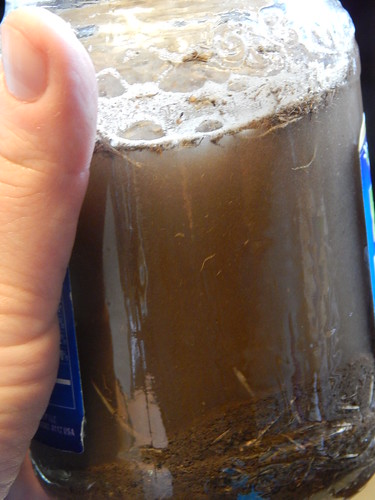 There’s my jar as I’m getting ready to shake. One thing I realized after letting the soil settle for the requisite 10 minutes is that they don’t take into account a soil with lots of organic matter. I had to scoop all the floating organic matter off the top in order to get samples that were just water.
 After letting it settle for 10 minutes, I very carefully used a teaspoon to put water into my tiny plastic tubes, up to the fourth line. I needed a pipette, but didn’t have one. Do you have one kicking around your house? Yeah, didn’t think so. Then I very carefully poured the powder from each capsule into the tubes. I didn’t spill very much. Then I capped them and shook them “thoroughly.” The powder in one tube got stuck in a bubble at the top, so I had to open it, pop the bubble, and then shake again.
Then I set my timer for 10 minutes to read the results.
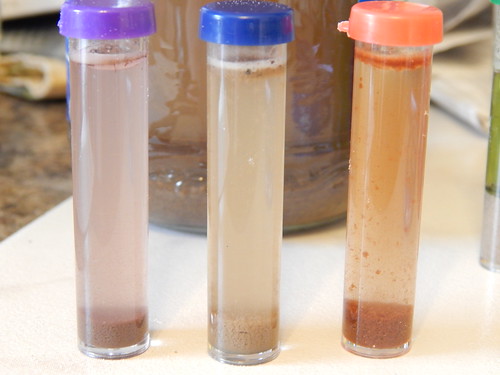 Here’s what I saw after 10 minutes. Hmm…Let’s take a closer look.

Okay, so this is the Nitrogen test. There is a faint pink color. (I was confused because the cap was purple, but whatever.) I’m still skeptical of the color gradients, but it looks like something in the low-ish range. That would actually be fairly accurate with where my soil test came out. Nitrogen tends to fluctuate a lot, but I hadn’t fertilized at all, so I’m not surprised to see this rating.
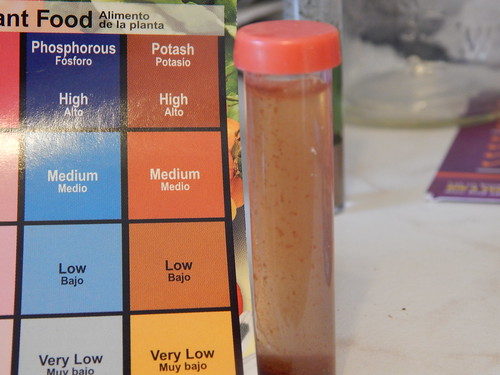
 Now the phosphorus. I apologize for the blurry photo. My camera couldn’t decide what to focus on. So, I’m a little disappointed in this one. Based on the chart, I would almost call this lower than very low. My lab test result came back at 46 parts per million, which would put me in the “medium” range for fruits and vegetables. On a lawn, that would put it into the “high” range for phosphorus. I suppose that is another limitation of this test. It assumes that what is considered low, medium, or high is the same regardless of what you are growing.
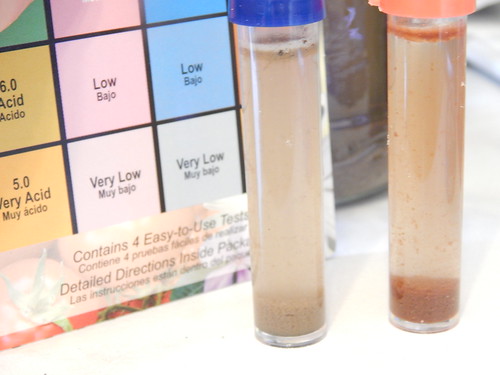
 Last, the potassium. Do I decide based on the flecks or the liquid color? I’m not sure. This was the one that had the bubble, so maybe I didn’t shake it enough afterwards? At any rate, it seems like it is in the low to medium range. My lab test put me just over the bubble into high, so it isn’t super accurate either.
The Recommendations
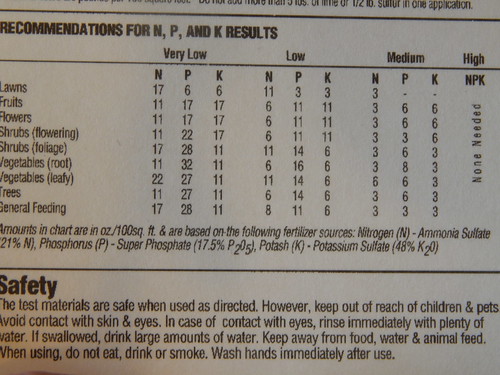 So here is their chart of what to apply. The rates are in oz/100 sq. ft using the fertilizer listed. The actual fertilizer recommendations aren’t too bad, providing that you managed to accurately determine which level you were in for each nutrient (and that the test was actually accurate itself!).
The soil pH recommendations aren’t too bad either, except that they give such a huge range in some cases. If I needed to change my loamy soil by 1.0 pH level to make it more acidic, it recommends 1 to 3 pounds of sulfur or iron sulfate. That’s quite a big range!
Final Thoughts
This probably won’t come as a huge surprise to you, but after doing this test, I don’t think that a test kit like this is really worthwhile. I know there are more expensive kits that can be reusable, but in this instance, you don’t really get any useful information that you can rely on.
When you get right down to it, any soil test, whether with a kit or done in the lab, is only as good as the sample you started with. If you submit a lab test where you only took one scoop of soil out of your entire garden, then the results are only applicable to that single scoop of soil. If you mix scoops of soil from your whole garden area, then your results will give you a good average of the area that will result in better recommendations.
Handouts from the Grow Good Food Workshop
If you couldn’t attend the workshop or if you missed out on one of the sessions, here are the presentations:
1. Getting Started with a New Garden Beginning Gardening
2. Choosing What to Plant Choosing What to Plant Handout
3. Common Pests & Problems Common Vegetable Pests & Problems
4. Growing Heirlooms & Saving Seed Growing Heirloom Vegetables & Saving Seed
5. Raised Bed Gardening (not available yet)
6. Success with Squash & Other Vines Success with Squash & Other Vines
7. Food Preservation 101 Preserving the Harvest Basics
8. Vegetables for Picky Eaters (not available yet)
9. Equipment & Gadgets for Food Preservation (not available yet)
Handout from the Planting & Preserving Workshop
I usually try to post the handouts/presentations from all of my classes on the blog, and I realized that I never posted my presentation from the Planting & Preserving Workshop back in February.
Planning and Planting to Preserve (PDF)
I realized in looking through the slides that I didn’t really have any speaker’s notes included. If you have questions after looking through the slides, please feel free to leave a comment or send an email and I’ll try to help you out.
First Plantings for 2014
After we got all the compost into the raised beds on Tuesday, we had a few things to get planted. Because of our garden plans this year, we just had a couple things to plant here and there.
First, we had ‘Yukon Gold’ potatoes to plant in the MG Favorites Garden. Unfortunately, I didn’t get any pictures of the planting. We also had a bundle of ‘Red Marble’ cippolini onion plants to go in the ground. They came in the mail yesterday, so we needed to get them planted.
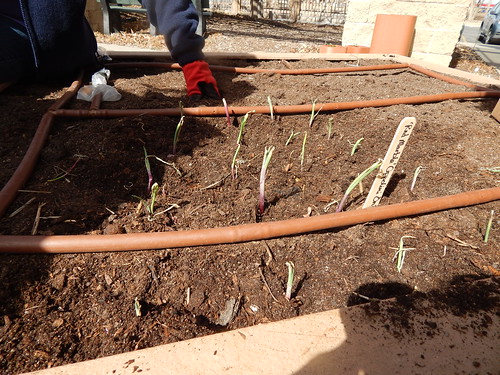 The cippolinis are relatively small onions that are much flatter than normal onions. We chose them specifically for the Italian Garden, and then decided to plant the rest in the Salsa Garden, since we already had them coming. The plants for these onions were pretty small – smaller than I’ve seen before with other onion plants. I’m assuming it is because the end product is also smaller?
 We also had some Lacinato Kale to plant in the Italian Garden and some ‘Parris Island Cos’ romaine lettuce for the Master Gardener Favorites Garden. These plants were started about a month ago, but I don’t think I ever got that on the blog.
We planted spinach and radishes in the MG Favorites Garden in an area that will be under the trellis later this spring. We also planted spinach in the ‘Taste of India’ Garden.
In the Italian Garden, we planted seeds of the endive/escarole mesclun and the ‘Italiko Rosso’ dandelion (red rib dandelion).
Hopefully by next week there will be growing things to photograph!
First Work Day for 2014
We had our first work day of the season this morning, and boy am I tired! I’m afraid that my gardening muscles are pretty out of shape this spring.
Our most important task for the day was to incorporate some beautiful, new compost into all of our beds. Since we renovated two years ago, the soil level has settled quite a bit. Some beds had dropped about 5+ inches of soil! So, adding compost gets us a boost of nutrients for the year, adds more bulk to our soil mix, and helps to counteract our very sandy soil in our raised beds.
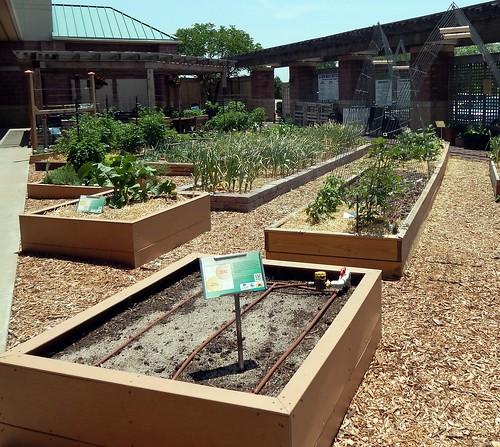 This is from early last summer (I got you excited, didn’t I?), and you can see that the soil level is dropped in the close bed and all the sand pooling on the surface.
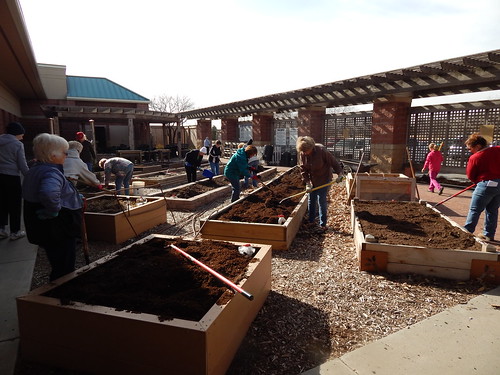 Look at that hard-working crew! We had a whole bunch of compost to work (6 cu. yards) and we got it done in record time! Based on our experience from filling the beds two years ago, we made trenches in each bed to help with the mixing process.
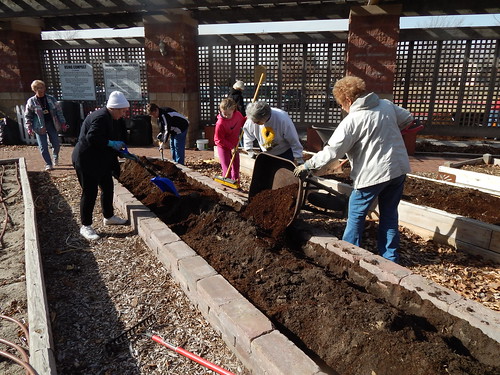 You can see here that we dug a couple trenches pretty close to the edges of the beds, because we found that it was pretty sandy right along the edges. Then we dumped in the compost and went to work mixing everything in.
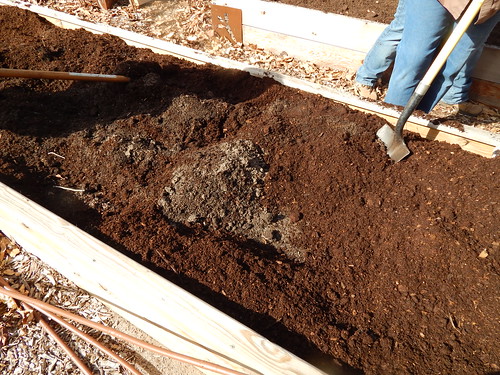 You can see the nice brown compost mixing with the lighter colored soil.
You may also have noticed that we removed the drip lines before the mixing. Since they were already disconnected, it wasn’t a big deal. However, nothing is worth having punctures and slices all through your drip lines! At that point you might as well start over.
 Our herb gardeners cleaned up the perennial herb garden, dug all the plants that were still alive, added the new compost, and then replanted. Even with the cold winter, some of the perennials are looking good! We were excited to see the French Tarragon looking so healthy, since it is the Herb of the Year this year.
We did get started planting a few things, but I need to save something to post about later this week, right?


