Category Archives: Techniques to Try
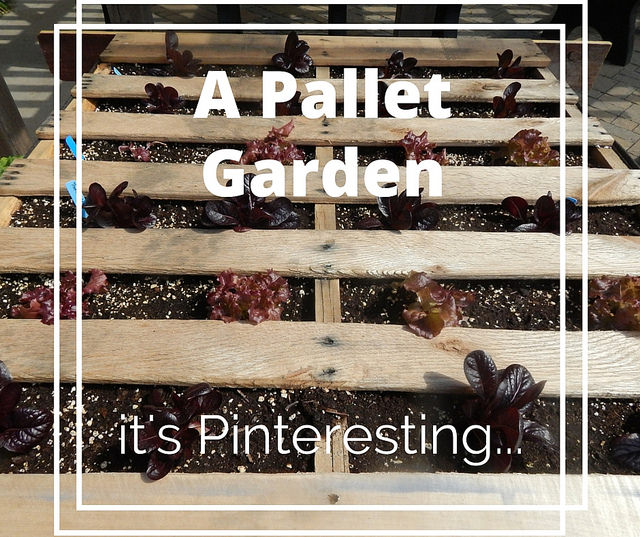
A Pallet Garden…It’s Pinteresting
If you’ve been on Facebook or Pinterest at all in the past couple years, you’ve probably seen someone growing something in a pallet. The plants look lush and gorgeous, you can set it up vertically so it doesn’t take up much space, and it looks soooo easy!
So we decided to try it out. I found some instructions that recommended stapling landscape fabric on the back and three sides, then filling with potting soil, planting, and waiting two weeks for plants to grow before setting it upright.
(I’ll give you the sneak preview…everyone thought this project was much more difficult than advertised!)
The starting point….an ugly old pallet. This is actually after we had started nailing down some of the loose slats. The other interesting thing – the bottom has extra holes in it where a forklift would pick it up. Hmm…which side to cover?
We decided to cover the side with the larger holes, because we weren’t sure how the soil would stay in otherwise. We also ended up doing two layers of landscape fabric to make sure it was sturdy enough.
One of the Master Gardeners had brought along a few old lathe slats and we decided to nail them along the back just to help stabilize everything. Did we have to do this step? No. Does everyone feel a lot better about the durability of the project now? Yes, absolutely!
It took about 4-5 cu. feet of potting soil to fill the pallet.
We planted some of our leftover lettuce seedlings in the pallet. We also have some strawberries that we will put in later. (If I don’t manage to kill them in my office first…watering…it’s helpful!)
The final result…it would have been more picturesque had we had some green lettuce too, but I guess we’ll survive with the two shades of red!
We will stand it up on end in another couple weeks and see how things go! My biggest concern with all projects like this is how are we going to keep it sufficiently watered, especially once it is vertical. I foresee lots of water running everywhere.
A Look at the Parthenocarpic Squash
Outwitting the squash vine borers is one of the ongoing themes in the garden this summer. Let’s take a look at our parthenocarpic (no pollination needed) squash trial.
This is the fancy cage we built for the row cover over the squash. We hadn’t really made new row covers/low tunnel frames for the new raised beds yet, so this seemed like a good opportunity to try something new. One of the things that I’ve always struggled with on our raised beds is how to manage the lower edges without resorting to a bunch of bricks or milk jugs of water. I had this idea to use a PVC frame along the bottom edge that the row cover could be clamped to. We also decided to make a larger, square frame because the squash get big, especially under cover.
The biggest problem we’ve had is that there’s no good way to open the row cover when we need to get in and work on the plants or harvest. When we take the clamps off, it tends to tear the fabric. So…it’s a good idea, but still a work in progress.
That’s what the clamps look like, in case you were curious.
The squash under the row cover are looking quite jungle-esque. This is pretty typical when you have plants under a row cover. They are protected from the wind and they are slightly shaded, so they tend to get a little bit tall and leggy. You can see the longer, skinnier stems on these plants compared to what you might expect. It’s also nice and warm under the row cover, so the plants grow quickly.
As you can see, we are starting to get some flowers. With most squash, when using row cover to circumvent the squash vine borer, we would take the row cover off right now. However, since we are using parthenocarpic varieties that supposedly require no pollination to set fruit, we shouldn’t need to do that. It will allow the protection to continue until we take the row covers off.
So…is that translating into squash? As you can see from this picture, the answer is not so much. There are several squash that are clearly rotting and have not successfully set. Now, it could just be early and this will straighten out. It could be that the varieties we picked are only partially parthenocarpic. Or it could be that the project is a big bust and we’ll have to take the row cover off to get any zucchini. I looked up the varieties we chose to see if there was any data on how they do. ‘Partenon’ was listed as setting fruit 69% of the time parthenocarpically. I didn’t find any data on ‘Segev’. So, we’ll see how things continue! The plus side is that even if we have to take off the row cover now, the plants should be large enough to withstand quite a bit of squash vine borer damage before they die.
Preparing for the Sudden Onslaught of Winter
I feel like I spend a lot of time on this blog talking about the weather, but it really isn’t just idle conversation! The weather is extremely important to our success as gardeners. After one light freeze and lots of unseasonably warm weather, we are looking at more than a week of unseasonably cold temperatures. Overnight lows look like they will be hovering in the upper teens to low 20s for the better part of the next two weeks. (At least that low of 9 degrees is gone, for now!) Many of the cool season vegetables will tolerate temperatures down to 24 or 25 without significant damage, but two weeks of lows down around 20 is probably a bit much for them to tolerate, especially when they haven’t been hardened off with cold-but-not-too-cold temperatures.
So…it was time to harvest some things and cover others this afternoon! Because I can’t resist experimenting, I left one or two plants of almost everything in the garden, just to see what would happen.
We already had the cold frame out, but still open. We closed it up and tucked some straw along the back edge to keep the cold air out.
We also put hoops and row cover over the main section of spinach and radicchio. Normally I’d leave those out, but I think this will be a bit cold all of a sudden.
I left some of the other spinach around the garden uncovered, including the Indian variety. (I don’t have great hopes for its cold hardiness!)
I harvested a few of the radicchio plants to see what stage they were at. I also harvested the watermelon radishes, fennel, half the bunching onions, and most of the dandelion greens. I was just going to leave the lemongrass, but then I just couldn’t let it go to waste, so it went to our Foods & Nutrition department.
I’ll post more pictures and show what I did with some of the different vegetables later in the week!
Thinning Seedlings
I think one of the hardest gardening tasks is thinning out seedlings. It is too easy to just let it go, because you are so excited to see the plants growing, and then everything is an overgrown, tangled mess that you can’t thin out. That’s one of the reasons that I try really hard to space things out when I plant the seeds. However, that doesn’t always work out.
On our trellises for growing vining vegetables, we usually want no more than 2-3 plants per side of the trellis. It seems like so little when you are planting just a few seeds, but planting too many can be a disaster later on!
You can see that there are at least 5 plants along this trellis, and I think there may have been another one or two that I didn’t get in the picture. Even though these plants will be growing up the trellis, if we left all of the plants in place, they would be so thick that we could have problems with diseases – especially if this hot, humid weather keeps on.
We removed all but 3 plants from each of the trellises, which will still be plenty thick by the time the plants are full grown.
Thinning Seedlings
I think that one of the least favorite parts of seed starting for everyone is the process of thinning seedlings. I hate it too! For that reason, I try very hard to only plant one seed per pot. I even plant extra pots “just in case” so that I don’t have to thin or transplant lots of seedlings. Of course, unless you are perfectly dexterous every time with tiny seeds, there are times when you end up with more seeds than you want in one spot.
If you have a couple seedlings in one pot, but on opposite sides, it isn’t the end of the world. They will usually be easy to divide later on if you want to. The hard part is when you have more than one seedling growing from essentially the same spot, like you can see here. When that happens, it is usually best and easier to just snip the two weaker seedlings off right at the soil level.
I KNOW that it is so tempting to just let them be. If you do that, you are ultimately compromising the ability of each individual plant to grow. If you just can’t bear to kill the other seedlings, then you can try to divide and transplant them. The key to this is to do it at this stage, when the seedlings are just starting to put on their first set of true leaves. They have large enough roots to handle it, but not so large that you will cause major damage when you separate the seedlings.
After thinning and a little bit of transplanting this afternoon, I have over 150 tomato seedlings growing in my office! Most of them are the heirlooms we’re going to try out this year, and I can already see differences in plant vigor as the seeds germinate.
So…I know it is hard, but if you have started seeds already, make sure you thin or transplant your extra seedlings soon! Can you believe that in only 2 weeks I will start moving these little guys outside to harden off?