It is hard to believe, but then end is in sight on our garden renovation. Really, we could plant now if we weren’t picky. But we are picky, and this is Kansas, so we WILL have the drip system installed before planting!
Since my last update we have completely filled all of our raised beds with our soil mix and have all the paths mulched. It feels great to be so close to having a complete garden again!
Let’s talk about our raised bed soil mix, and why I don’t recommend that you do what we did. This is definitely a case of “do what we say, not what we do.”
We mixed sand and compost at about a ratio of 3 parts compost to 2 parts sand. Normally, I would not recommend that you use pure sand in a raised bed, for several reasons.
- First and foremost, a raised bed is supposed to be a method of improving your existing soil, not ignoring your native soil and using something else. I always recommend using your existing soil and adding additional topsoil and compost to fill a raised bed. In this area, most of our soils are clay loams. If you add some sand to a clay loam, you make very nice adobe brick, but not very nice garden soil. (In our case, we weren’t planning to garden in the existing soil as much as garden ON it, so that wasn’t a consideration.)
- Raised beds facilitate drainage and cause soil to dry out quickly. Sand drains and dries out quickly without a raised bed, so it could be a challenge to keep it watered.
- Sand is very poor at holding nutrients. We’ve balanced that with the amount of compost, but it could be several years of adding compost before our raised bed mix is a nice loam instead of a compost & sand mix.
- Sand in this area of Kansas usually comes out of sandpits, and sandpits often have very salty water in the bottom. Topsoil can also have its own problems, so maybe this is a case of “6 of one, half dozen of another.” No matter what, you should always get a soil test done before planting in a new soil mix!
In our case, we are “creating” new soil from scratch without much intention to use the existing soil at all. That makes the sand not a problem. Also, once we got down to the native soil beneath the clay hard-pack, it is a sandier soil. If you are starting from a clay loam native soil, you probably shouldn’t use sand.
Okay, back to filling the raised beds.
 Here’s a big pile of sand.
 And a big pile of composted horse manure. Obviously not mixed with the sand yet. The sand arrived first, so we started filling beds with a layer of sand, thinking it would be easier to mix the sand and compost in the beds than in the wheelbarrows.
 You can see that we put about 3″ of sand in the bottom of all the beds, and then started mixing compost once it arrived. We also put some of the sand down in the walkways in areas where the gravel was a little thin and also under the edges of the raised beds in spots where we didn’t have enough gravel/soil to get the edges leveled right.
 We also took some time to dig down and place some rebar stakes next to the water lines to stabilize them. Since they are now tied in directly to the irrigation main line, the water pressure is crazy high, and we wanted something to hold that plastic more stable.
 After the first go-round with the sand and compost, we figured out pretty quickly that it was much easier to do alternating scoops of sand and compost into the wheelbarrows rather than mix in the beds. Much better!
 The semi-mixed soil was much easier to work with in the beds!
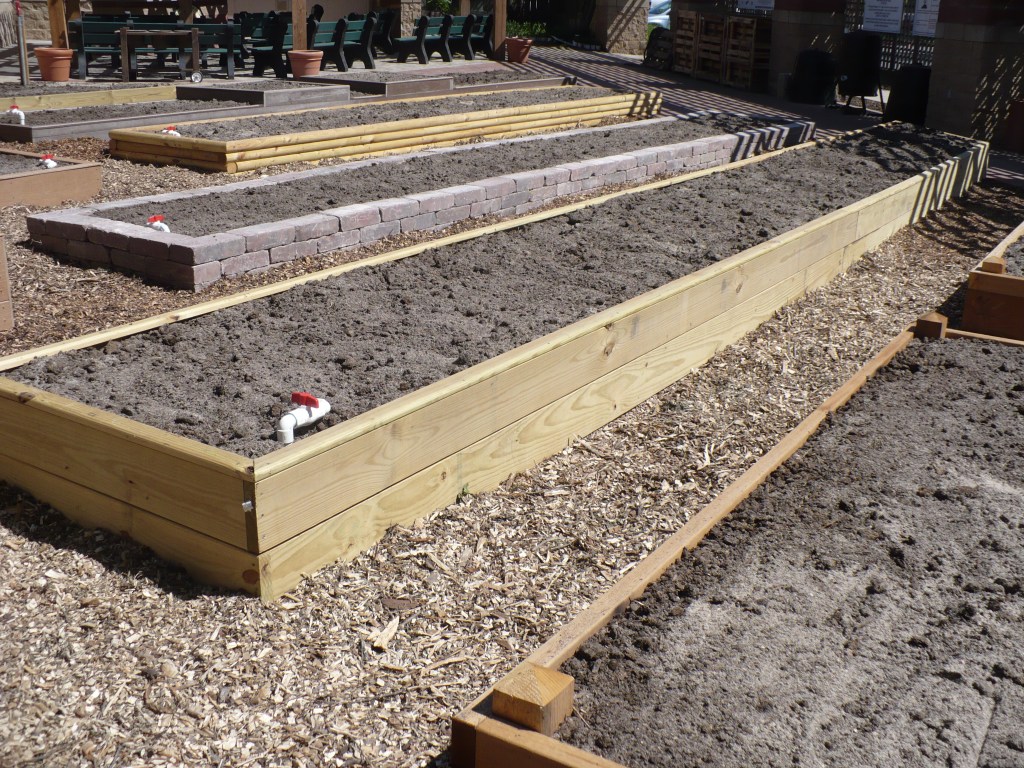
 Here’s the end result. About 20-25 Master Gardener volunteers worked Monday and Tuesday mornings and Wednesday afternoon to get to this point – beautifully filled raised beds and completely mulched pathways!
As we were getting our sand and compost deliveries, I pulled soil samples of the sand and compost individually and also a bag of mixed sand and compost to get tested. We are testing for pH, N, P, K, Organic Matter, and salt-alkali. The salt-alkali is a test that measures the amount of sodium as a percentage of total soluble salts. Because of the sand, I wanted to make sure everything is in good shape before we get too far along. When we get the results back, I’ll be sure to fill you in on what we find!
Our remaining garden renovation tasks include:
- Installing the drip irrigation lines
- Construction of the handicap accessible raised bed (details TBD…this may not be very soon)
- Installing permanent signage (developed over the course of the year)
- Installing signage for each bed in some form
Of course, we will also quickly be moving into our regular pattern of gardening (and blogging) as we hopefully can get some planting done in the next couple of weeks.

Leave a comment